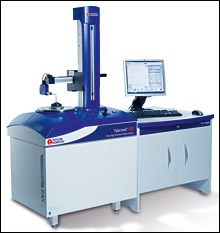
新的Talyrond 500系列Taylor Robsonrange enables measurement of three critical performance elements, Roundness, Surface finish, and now Contour, exactly as they were produced.
可再现的测量结果
数十年的经验,超精确的加工专业知识和FEA优化的设计相结合,可提供低噪声和几乎完美的测量轴机械执行。通过使用可追溯标准和独家算法有效地消除了仪器的影响,从测量结果中取得了进一步的增强。

制造过程的高精度仿真
The all-new Talyrond 500 roundness instruments use rotary, vertical and horizontal measuring datums to duplicate your machine tool's movement and exactly reproduce the workpiece shape. This ultra high precision simulation of the cutting tool path enables precise control of your manufacturing process.
多学科的测量
Understanding the manufacturing process means understanding the measurement process
在轴上制成,在轴上测量
在轴上制成,在轴上测量
Machine tool spindles constrain the work piece or tool movement to rotate about a fixed axis, while the tool path is controlled by slide ways set parallel or square to this axis. This allows the manufacture of profiled parts that are cylindrical or round in nature and have a functional axis. By the same philosophy, theTalyrond 500range of instruments can measure profiled parts that are cylindrical or round by tracing a stylus along the same rotational axis, allowing reproduction and subsequent adjustment to the machine tool path, thereby controlling the process and improving product quality.